

Introduction
Building a good web application is about more than creating an attractive user interface. A frontend should be easy to use, responsive across different devices, and able to communicate reliably with the backend. This was the main idea behind my React Frontend development task, where I built a full-stack task management application called TaskFlow.
The goal was to create a practical application that allows users to register, log in, create tasks, update their information, track completion, and delete tasks. Instead of building a frontend with static or sample data, I connected it to an existing REST API so that the application could work with real data.
In this article, I will explain how I approached the project, the technologies I used, how I organized the application, and some of the challenges I faced during development.
1. Understanding the Project Requirements
Before starting development, I divided the requirements into smaller parts. This helped me understand what the application needed and how each feature would connect with the others.
The main requirements were:
- Build a responsive frontend using React.
- Create multiple pages using React Router.
- Connect the frontend to a REST API.
- Implement user authentication.
- Build forms with client-side validation.
- Support complete task management operations.
- Display loading, error, and empty states.
- Maintain a clean and consistent user interface.
I decided to build a task management dashboard because it provided a practical way to demonstrate all these requirements in one application.
The application was named TaskFlow, and its main purpose was to provide users with a simple workspace for managing their daily tasks.
2. Technology Stack
I selected technologies that would make the application maintainable and easy to extend.
Frontend Technologies
React
React was used to build the user interface through reusable components. Instead of writing the entire application as one large component, I separated different parts of the interface into smaller components and pages.
Vite
I used Vite as the frontend build tool and development server. It provided a fast development environment and helped generate the production build.
Tailwind CSS
Tailwind CSS was used for styling. Its utility classes made it easier to create consistent layouts, spacing, colors, buttons, cards, and responsive designs without writing large amounts of custom CSS.
React Router
React Router handled navigation between different pages. It allowed me to create separate routes for the dashboard, task list, task creation, task details, editing, login, and registration.
Lucide React
Lucide React provided icons for navigation, task status, actions, and dashboard elements.
Backend Technologies
The frontend communicated with an existing backend built using:
- Node.js
- Express.js
- SQLite
- JSON Web Tokens (JWT)
- bcryptjs
The backend handled authentication, database operations, and task-related API requests.
3. Planning the Application Structure
One of the important decisions I made was to organize the project into separate folders based on their responsibilities.
This made it easier to maintain the code and locate individual features.
The main frontend structure was:
frontend/
├── public/
├── src/
│   ├── components/
│   │   ├── layout/
│   │   │   ├── Header.jsx
│   │   │   ├── Sidebar.jsx
│   │   │   └── MainLayout.jsx
│   │   └── ProtectedRoute.jsx
│   │
│   ├── context/
│   │   └── AuthContext.jsx
│   │
│   ├── hooks/
│   │   └── useTasks.js
│   │
│   ├── pages/
│   │   ├── Dashboard.jsx
│   │   ├── AllTasks.jsx
│   │   ├── CreateTask.jsx
│   │   ├── TaskDetails.jsx
│   │   ├── EditTask.jsx
│   │   ├── Login.jsx
│   │   └── Register.jsx
│   │
│   ├── services/
│   │   └── api.js
│   │
│   ├── App.jsx
│   └── index.css
│
├── package.json
└── vite.config.js
Each folder has a specific responsibility.
- components: Contains reusable interface elements.
- context: Manages shared authentication information.
- hooks: Contains reusable logic for fetching task data.
- pages: Contains the different application screens.
- services: Handles communication with the backend API.
This structure helped keep the application organized as more features were added.
4. Designing the TaskFlow Dashboard
I wanted the application to have a clean and modern SaaS-style dashboard.
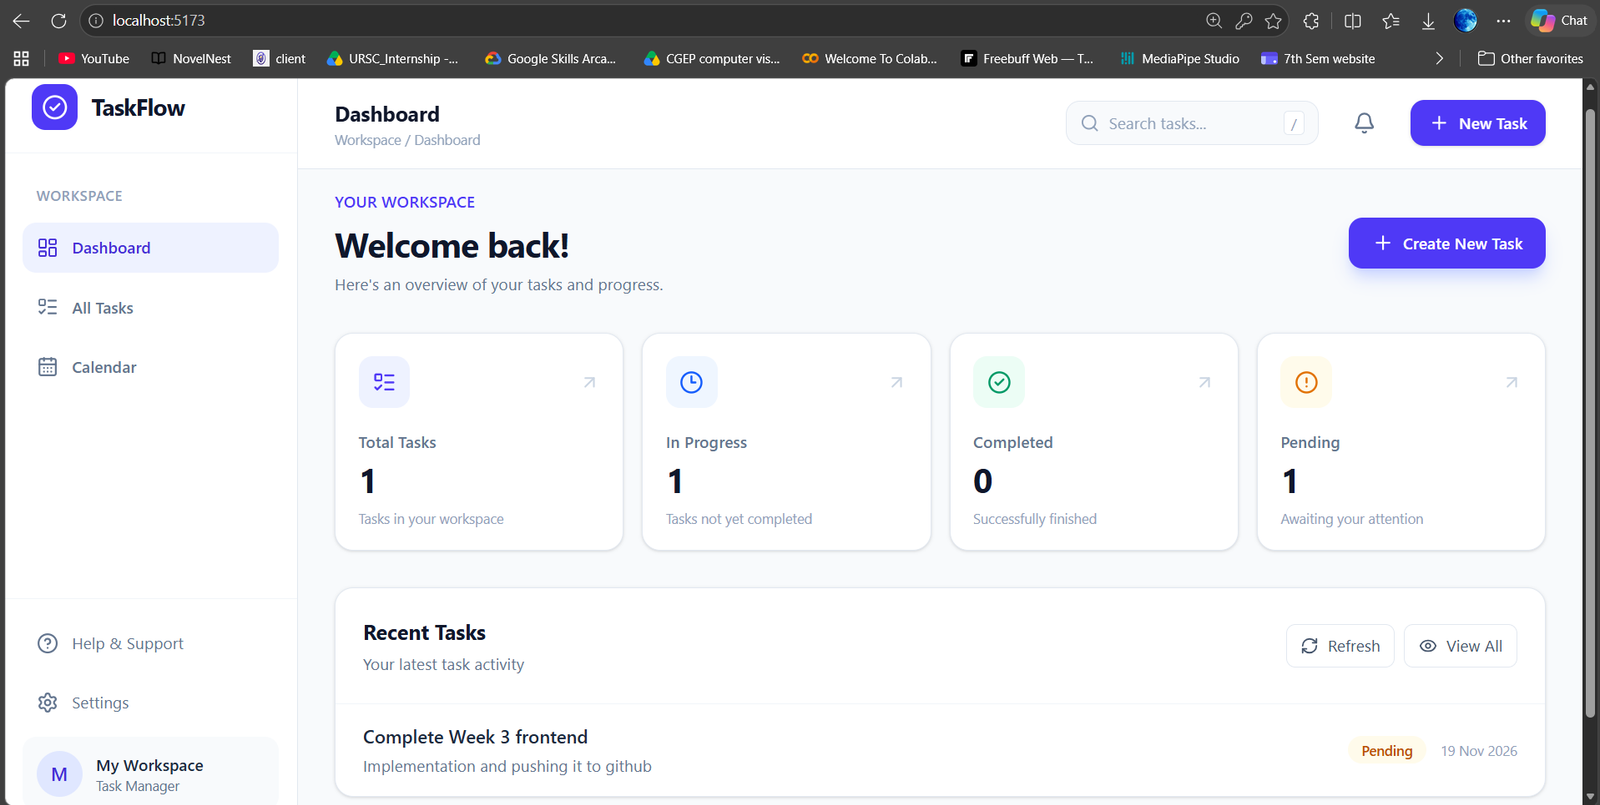
The dashboard was designed with a sidebar, a top navigation header, task statistics, and a recent tasks section.
The sidebar provides navigation to:
- Dashboard
- All Tasks
- Calendar
- Help and Support
- Settings
- Sign Out
The dashboard also contains four overview cards:
- Total Tasks
- In Progress
- Completed
- Pending
These values are calculated using task data retrieved from the backend rather than hardcoded sample values.
The recent tasks section displays the latest tasks, including their titles, descriptions, creation dates, and completion status.
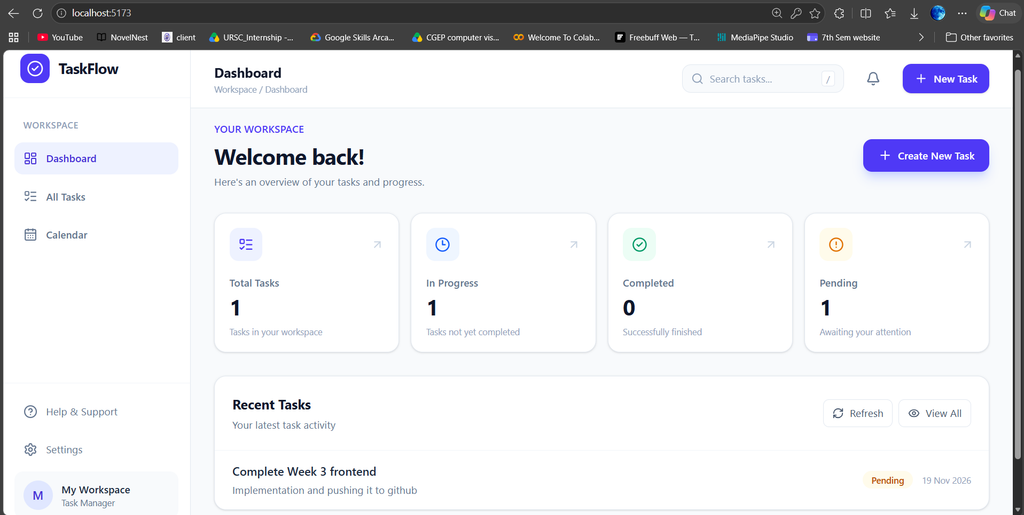
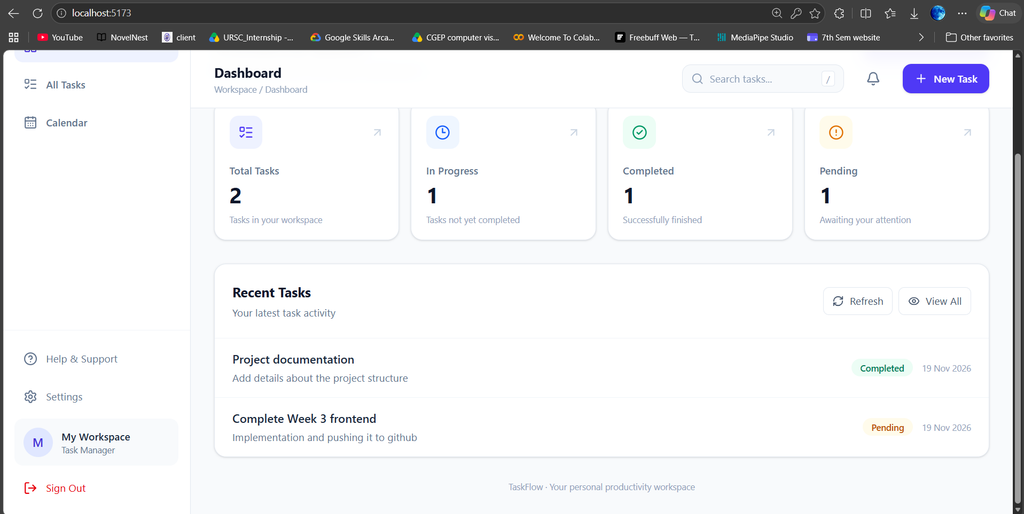
Image alt text: TaskFlow React frontend dashboard showing task statistics, recent tasks, and sidebar navigation.
The design uses a consistent color scheme, rounded cards, clear typography, and simple icons. I also focused on making the layout adaptable to smaller screen sizes.
5. Implementing Navigation with React Router
A task management application needs multiple screens, so I used React Router to manage navigation.
The main routes include:
| Route | Purpose |
|---|---|
/login | User login |
/register | New user registration |
/ | Dashboard |
/tasks | View all tasks |
/tasks/new | Create a task |
/tasks/:id | View task details |
/tasks/:id/edit | Edit a task |
I also created a shared layout using MainLayout.jsx. It contains the sidebar and header, while the individual pages are rendered inside the layout.
This avoided repeating the same navigation elements on every page.
Another important part was implementing protected routes. Pages such as the dashboard and task management screens should only be accessible to authenticated users.
I used a ProtectedRoute component to check the authentication state before allowing access.
6. Implementing User Authentication
Authentication was one of the most important parts of the application.
I implemented registration and login pages with client-side validation.
During registration, users provide:
- Name
- Email address
- Password
- Password confirmation
The frontend validates the input before sending it to the backend.
For login, the application sends the email and password to the authentication endpoint. When authentication succeeds, the backend returns a JWT token and user information.
The frontend stores the token in browser local storage and attaches it to protected API requests using the Authorization header.
The authentication flow works as follows:
- The user enters their login credentials.
- The frontend sends a login request to the backend.
- The backend verifies the credentials.
- A JWT token is returned after successful authentication.
- The frontend stores the token.
- Protected requests include the token.
- The application restores the login session when the user refreshes the page.
- Signing out removes the stored token and redirects the user to the login page.
I also used React Context to share authentication information across components without passing user data through multiple levels of props.
7. Connecting React to the REST API
A frontend becomes useful when it can communicate with the backend and work with actual data.
For this project, I created a centralized API service in src/services/api.js.
Instead of writing separate fetch configurations in every page, I created a reusable request function. It handles:
- HTTP methods
- Request headers
- JSON request bodies
- JWT authorization
- API responses
- Error messages
The application communicates with the following task endpoints:
| HTTP Method | API Endpoint | Operation |
|---|---|---|
| POST | /api/tasks | Create a task |
| GET | /api/tasks | Retrieve all tasks |
| GET | /api/tasks/:id | Retrieve a specific task |
| PATCH | /api/tasks/:id | Update a task |
| DELETE | /api/tasks/:id | Delete a task |
I also configured the Vite development server to proxy API requests to the local backend. This allowed the frontend to communicate with the backend through the /api path during development.
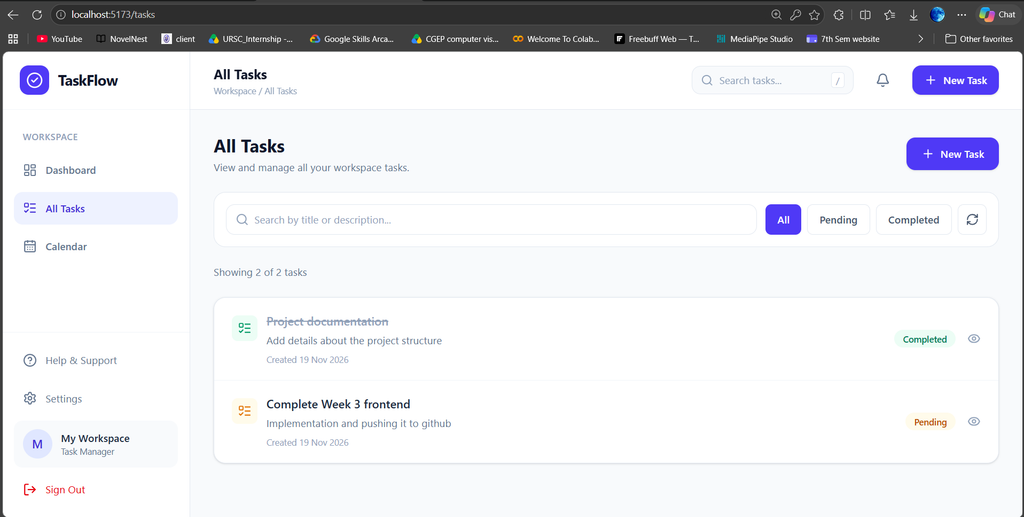
Image alt text: React task management application displaying the All Tasks page with search, status filters, and task information.
8. Implementing CRUD Operations
CRUD stands for Create, Read, Update, and Delete. These operations form the foundation of the task management functionality.
Create
The Create Task page allows users to add a new task by entering a title and an optional description.
Before submitting the form, the frontend checks that the title is not empty. It also displays a loading state while the request is being processed.
After successful creation, the application redirects the user to the task details page.
Read
The All Tasks page retrieves tasks from the backend and displays them in a structured list.
Users can search for tasks using their title or description. They can also filter tasks based on whether they are pending or completed.
Each task can be opened to view its individual details.
Update
The Edit Task page retrieves the existing task information and fills the form with its current values.
Users can change the title or description and save the changes through the update API.
The application also allows users to change a task’s completion status.
Delete
Users can delete tasks from the Task Details page.
Before deletion, the application displays a confirmation message. This helps prevent accidental removal of tasks.
After successful deletion, the user is redirected to the All Tasks page.
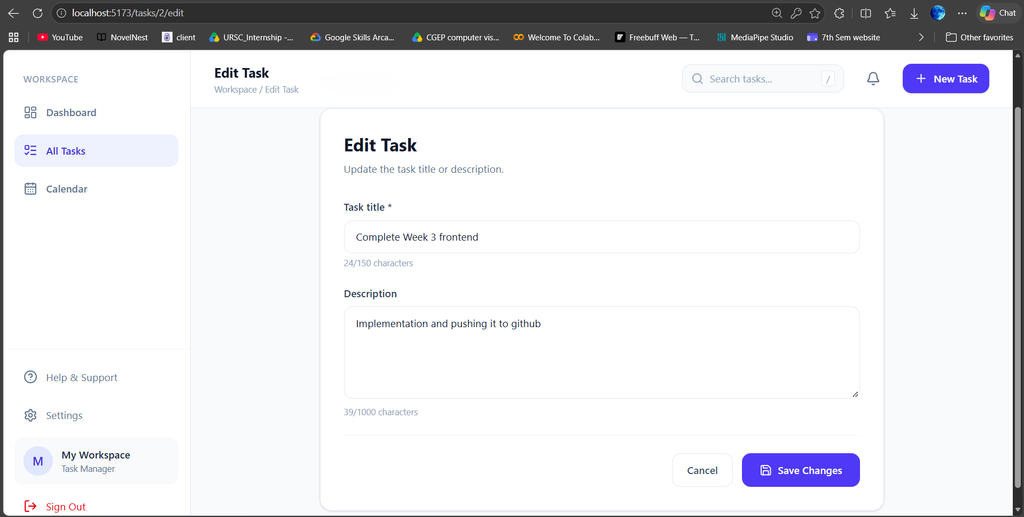
Image alt text: TaskFlow task details and editing interface showing task information and available actions.
9. Managing State and API Responses
React state management was important because different parts of the application depend on the same task information.
I used useState to manage form values, loading indicators, errors, and authentication-related information.
I also created a custom hook called useTasks.js.
This hook handles fetching task data from the backend and maintains:
- The list of tasks
- Loading state
- Error messages
- A function to refresh task data
Using a custom hook made it easier to reuse task-fetching logic in different pages.
I also added appropriate loading and error states.
For example:
- While tasks are being fetched, a loading indicator is displayed.
- If the backend cannot be reached, an error message and retry option appear.
- If the user has no tasks, an empty-state message is shown.
These details help make the application more reliable and easier to use.
10. Responsive Design
A modern frontend should work across different screen sizes.
I used Tailwind CSS responsive utility classes to adapt the layout for desktop, tablet, and mobile screens.
Some of the responsive design improvements included:
- A sidebar that becomes a mobile navigation drawer.
- Flexible layouts for dashboard cards.
- Forms that adjust to smaller screens.
- Buttons with appropriate spacing.
- Task lists that adapt to different screen widths.
The goal was to maintain the same functionality without making the interface difficult to navigate on smaller devices.
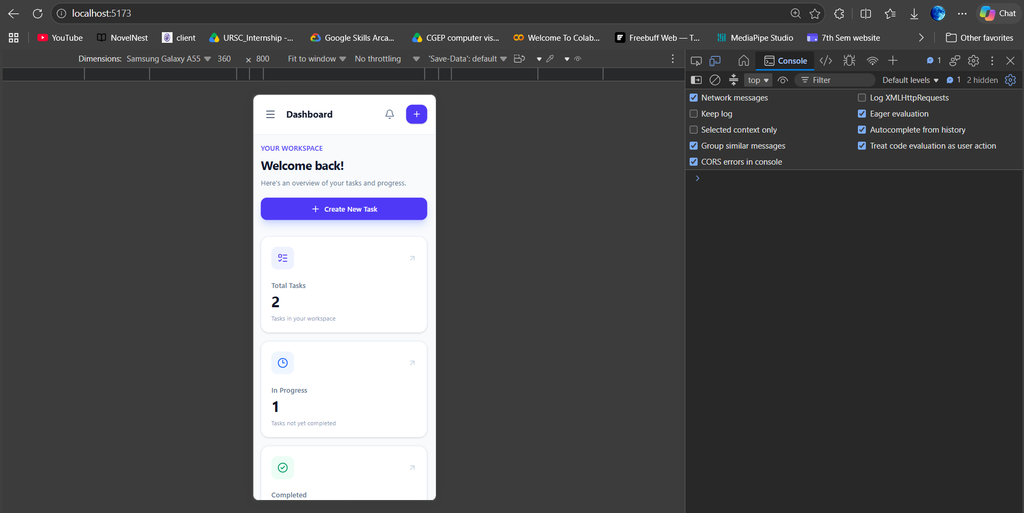
Image alt text: Responsive TaskFlow React frontend displayed in a mobile layout.
11. Challenges I Faced During Development
The project involved several practical challenges.
Routing and layout integration
One issue I encountered was connecting the protected routes with the shared application layout. The dashboard content initially rendered without the sidebar and header because the nested route structure was incorrect.
I fixed this by using React Router’s nested routes and the Outlet component correctly.
Authentication persistence
Another challenge was maintaining the login session after refreshing the browser. I handled this by restoring the user session through the authentication API when the application starts.
API integration
Connecting different pages to the backend required consistent handling of authentication headers, request bodies, and API errors. Creating a centralized API service helped avoid repeating the same logic.
Real-time UI consistency
After creating, editing, completing, or deleting a task, the application needed to display the latest data. I addressed this by fetching task information when the relevant pages load and providing refresh functionality.
These challenges helped me understand how frontend components, application state, routing, and backend APIs work together.
12. Testing and Final Verification
After implementing the main features, I tested the application to verify that the frontend and backend worked together.
The checks included:
- User registration and login.
- Protected route access.
- Session persistence after refresh.
- Task creation.
- Task listing and individual task retrieval.
- Task editing.
- Task completion and status changes.
- Task deletion.
- Search and filtering.
- Loading and error handling.
I also generated a production build using:
npm run buildThe build completed successfully, confirming that Vite could compile the frontend for production.
The project was then committed and pushed to a separate public GitHub repository.
GitHub Repository: TaskFlow – React Frontend
13. What I Learned
This project helped me understand that frontend development is not limited to designing pages and adding buttons.
I gained practical experience in:
- Building reusable React components.
- Managing application state with React Hooks.
- Creating multi-page applications with React Router.
- Implementing authentication and protected routes.
- Integrating REST APIs using Fetch.
- Managing asynchronous operations and API errors.
- Building responsive interfaces with Tailwind CSS.
- Organizing a maintainable frontend project.
- Using Git and GitHub for version control.
Most importantly, I learned how to connect the frontend and backend into a working application instead of treating them as separate parts.
Conclusion
Building TaskFlow was a valuable experience in developing a complete React frontend that communicates with a real backend.
From planning the component structure to implementing authentication, API integration, CRUD operations, and responsive layouts, each stage helped me understand more about practical frontend development.
The project also showed me the importance of clean code organization, reusable components, proper error handling, and testing before submission.
I look forward to applying these concepts in more projects and continuing to improve my skills in React and full-stack web development.
The complete TaskFlow React Frontend project is available on GitHub.
Useful Technical References
- React Documentation
- Vite Documentation
- React Router Documentation
- Tailwind CSS Documentation
- Express.js Documentation
If you found this project useful, feel free to explore the repository and share your feedback.

Leave a Reply
You must be logged in to post a comment.